Image Cropper
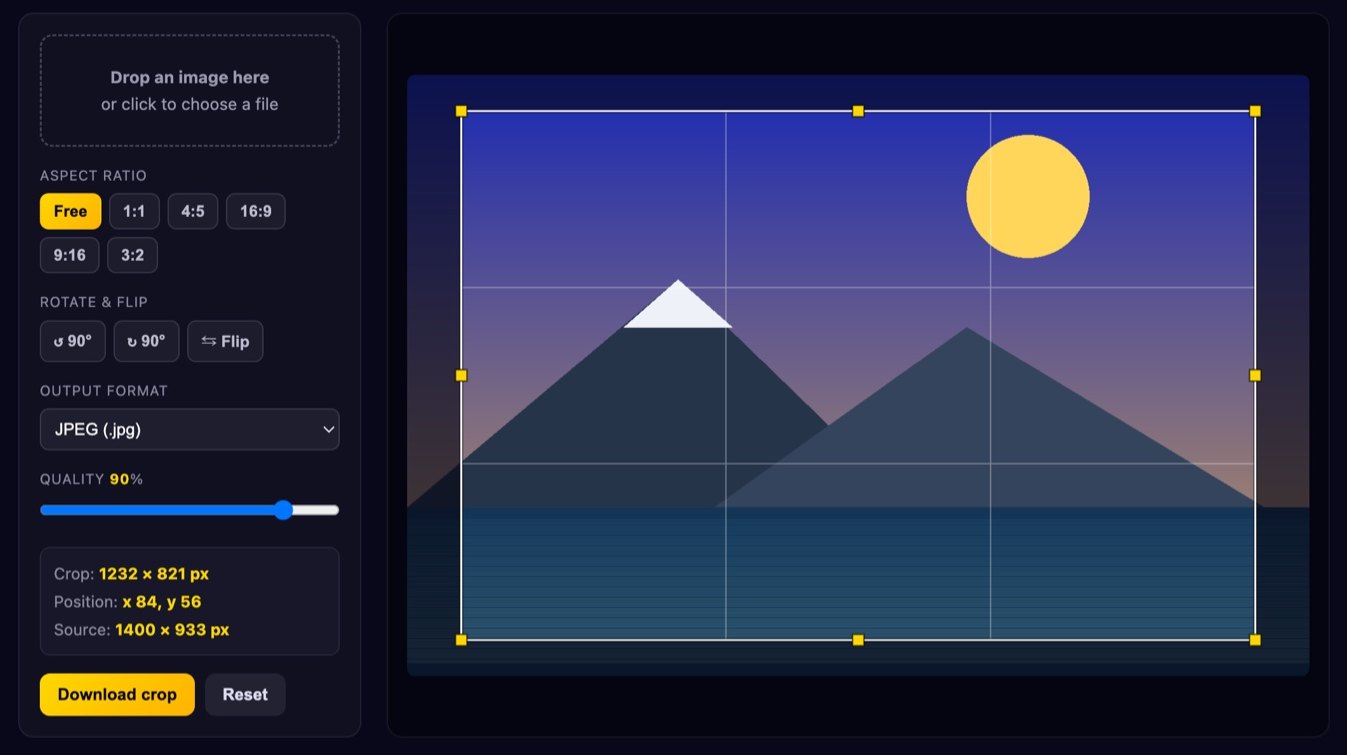
Drag a selection over your photo, lock it to a ratio like 1:1, 4:5 or 9:16, rotate or flip if you need to, and download the crop at the original full resolution. Everything happens on your device — the file is never uploaded to a server.
or click to choose a file
Position: –
Source: –
Drag the box to move it, pull the handles to resize.
How to crop an image
- Add your photo. Drag a file onto the box or click it to pick one. JPEG, PNG, WebP, GIF and most other formats your browser can display will work.
- Pick a ratio (or stay free). “Free” lets you drag any shape. Choosing 1:1, 4:5, 16:9, 9:16 or 3:2 locks the selection so every handle keeps that exact proportion.
- Position the selection. Drag inside the box to move it, and pull any of the eight handles — four corners, four edges — to resize. The box can never leave the image, so you will not end up with transparent or black bars.
- Straighten the orientation if needed. Rotate 90° left or right for photos that came off a camera sideways, or flip horizontally to mirror the shot.
- Check the readout. The panel shows the crop in real output pixels, not preview pixels, so you know exactly how big the saved file will be before you save it.
- Choose a format and download. JPEG for photos, PNG when you need sharp edges or transparency, WebP for the smallest file at a similar quality. The quality slider applies to JPEG and WebP.
The preview is scaled down to fit your screen, but the export is not. When you hit download, the selection is mapped back onto the original pixels and re-cut from the full-size image, so a crop from a 6000×4000 photo comes out at full camera resolution.
Cropping for social media
Every platform silently reframes anything that does not match its preferred shape, and it almost never crops where you would have. Cropping deliberately beforehand is the only way to control what survives.
| Ratio | Where it is used | Typical pixels |
|---|---|---|
| 1:1 | Square feed posts, profile pictures, thumbnails in grids | 1080×1080 |
| 4:5 | The tallest portrait an Instagram feed post allows — it takes the most vertical screen space without being cropped | 1080×1350 |
| 9:16 | Stories, Reels, TikTok, YouTube Shorts — full-screen vertical video and images | 1080×1920 |
| 16:9 | YouTube thumbnails and video, blog headers, presentation slides | 1920×1080 |
| 3:2 | The native shape of most DSLR and mirrorless sensors, and standard print sizes | varies |
Two practical notes. First, on 9:16 content, keep anything important away from the top and bottom edges — interface elements such as captions, usernames and the like sit over roughly the top 12% and bottom 20% of the frame. Second, a 4:5 image gets shown as a centre-cropped square in profile grids, so check that your subject still reads when the top and bottom fifths disappear.
Composition: the rule of thirds and headroom
The overlay inside the selection divides it into thirds both ways. The old guideline is to put your subject on one of those lines, or on one of the four intersections, rather than dead centre. It works because an off-centre subject leaves room for the eye to travel, and the frame reads as a scene rather than as a mugshot.
A few things matter more than the grid itself:
- Eyes go on the upper third. For portraits this single rule fixes most amateur framing. Put the eye line on or slightly above the upper horizontal line and the headroom sorts itself out. Too much space above the head is the most common mistake in phone photos.
- Leave space in the direction of travel or gaze. If your subject faces or moves left, leave more empty frame on the left. Cropping tight against the face they are looking at feels claustrophobic; the extra space reads as intention.
- Do not cut through joints. Crop mid-thigh, mid-upper-arm or mid-torso — never at the ankle, knee, wrist, elbow or neck. A limb cut exactly at a joint looks amputated; cut through the middle of a bone and the brain fills in the rest.
- Keep the horizon off the middle. Interesting sky, put the horizon on the lower third. Interesting foreground, put it on the upper third. A centred horizon splits the image into two competing halves.
- Crop out the distraction, not the context. Beginners over-crop. Tightening in on a face removes the sign, the room, the weather — everything that told the viewer where they are. Cut the bin bag in the corner, keep the street.
Cropping does not reduce quality — but it does reduce pixels
Cropping is not a lossy operation in itself. Nothing is stretched, resampled or blurred; the tool simply copies a rectangle of the original pixels into a new image, one to one. If you crop a PNG to PNG, the pixels you keep are bit-for-bit identical to the ones you started with.
What changes is how many pixels you have left. Take a 4000×3000 photo and crop a small 800×600 detail out of it: the result is genuinely 800×600. It will look perfect at that size, but if you then blow it up to fill a 1920-pixel-wide banner, you are asking software to invent 140% more pixels than exist, and it will look soft and mushy no matter which tool does the enlarging.
So the practical rule is to decide the final display size first, then check that your crop is at least that big. For a 1080×1350 Instagram post, keep the selection at 1080 pixels wide or more — the readout tells you live. If your crop lands slightly under target, our image resizer can scale it up a little; going up by 10–20% is usually invisible, going up by 200% never is.
One thing that does cost quality: re-saving a JPEG. Every JPEG save is a new lossy compression pass, so a photo that has been cropped and re-saved five times carries five generations of artefacts. Crop from the original file rather than from an already-edited copy, and keep quality at 85–95 for anything you might edit again.
Is my image uploaded?
No. The file is read by your browser with the FileReader and Canvas APIs and drawn straight onto a canvas element on this page. There is no upload, no server-side processing, no temporary copy sitting in someone's storage bucket, and no queue. You can confirm it yourself: open your browser's network tab, load an image, download a crop, and you will see no request carrying your file. The tool even works with your connection switched off after the page has loaded. Details are in our Privacy Policy.
FAQ
Does cropping change the original file?
Never. Your file on disk is untouched — the tool only reads it. The download is a new file, saved wherever your browser puts downloads, so you always keep the original to go back to.
Why is the preview smaller than my photo?
The preview is scaled to fit your screen so you can see the whole frame while you drag. The crop coordinates are stored as a fraction of the original image and mapped back to full resolution at export time, which is why the readout shows real output pixels rather than what you see on screen.
Can I crop to an exact pixel size?
Indirectly: lock the ratio you need, drag until the readout shows roughly the right size, then run the result through the image resizer to land on the exact number. Locking the ratio first is what guarantees the resize will not distort anything.
Does it keep transparency?
Yes, if you export as PNG or WebP. JPEG has no alpha channel, so transparent areas are filled with white when you choose it. Pick PNG for logos, screenshots and anything with a cut-out background.
Is there a file size limit?
There is no limit imposed by the tool, only by your device's memory. Photos from any current phone or camera, including 50-megapixel files, are fine on a normal laptop. Very large panoramas may take a second to appear while the browser decodes them.
Does it work on a phone?
Yes. The selection is driven by pointer events, so dragging the box and pulling the handles works the same with a finger as with a mouse. Pinch-zoom on the page is unaffected outside the canvas.
Next up: change the dimensions with the image resizer, add captions with the meme generator, or browse everything in our free tools.